Whether you’re dealing with a minor sprain or need to provide support to a sore muscle, having an ace bandage on hand can be incredibly helpful. However, there might be times when you don’t have one readily available. In such cases, creating a homemade ace bandage can come to your rescue. In this DIY guide, we’ll take you through the steps of making your very own ace bandage at home.
Accidents and injuries can happen anytime, and having basic first aid supplies can make a significant difference. An ace bandage is a versatile tool that provides compression and support to injured areas.
While store-bought options are readily accessible, choosing to create your own homemade version might offer benefits in terms of cost-effectiveness and convenience.
Step-by-Step Guide for Making Homemade Ace Bandage
Step 1: Gather Your Materials
To start making your homemade ace bandage, you’ll need a few essential materials: stretchable fabric, scissors, fasteners (like Velcro or clips), and measuring tape. These items are typically found around the house or can be purchased inexpensively.
Step 2: Choosing the Right Fabric
The choice of fabric is crucial for a comfortable and effective ace bandage. Look for a fabric with good elasticity and breathability. A stretchy cotton blend or a knit fabric works well. Avoid materials that are too rigid or may cause skin irritation.
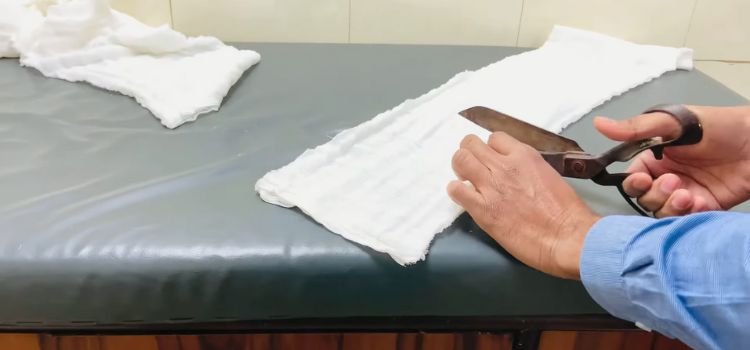
Step 3: Measuring and Cutting the Fabric
Measure the injured area to determine the length and width needed for your bandage. Remember to leave some extra length for securing the bandage. Cut the fabric according to your measurements. It’s better to cut it slightly longer than necessary, as you can always trim it later if needed.
Step 4: Adding Fasteners for Your Homemade Ace Bandage
To maintain the position of your ace bandage, fasteners become essential. By connecting a section of the fastener material to each fabric edge, you enable the firm yet comfortable securing of the bandage around the injured area.
Step 5: Applying the Homemade Ace Bandage
Place the bandage over the injured area and hold the initial end in place. With a gentle touch, start to wrap the bandage around the injured area, taking care that it’s snug without being overly tight. Overlapping the fabric slightly with each turn will provide the desired compression and support.
Using Ice Packs with Your Homemade Ace Bandage
To enhance the sense of relief, an ice pack can be positioned on the affected area prior to being encased with the ace bandage. Make sure to use a cloth barrier between the ice pack and your skin to prevent frostbite.
Caring for Your Homemade Ace Bandage
After use, it’s essential to keep your homemade bandage clean and hygienic. Hand wash it in mild detergent and air dry it to maintain its elasticity and shape.
When to Consult a Doctor
While homemade ace bandages can provide some support for minor injuries, it’s important to recognize that they might not be sufficient for more severe sprains, strains, or persistent pain. In these cases, seeking advice from a medical professional becomes crucial. These could be indicative of a more severe underlying issue that requires proper medical attention.
Conclusion
Crafting a homemade ace bandage can be a handy skill in situations where a store-bought bandage isn’t readily available. With just a few materials and a bit of effort, you can create a functional and effective bandage that provides the support and compression needed for minor injuries.
🔗 Related HEATH TIPS & TRICKS:
Leave a Reply